Setting Appointment Content Preferences
Selecting the Appointment Content Preferences option under the Scheduling heading on the Preference Editor Sheet Bar enables you to customize the data elements that will appear on scheduled appointments in the schedule grid.
To set preferences for how data for an appointment is displayed on the Scheduling Grid
-
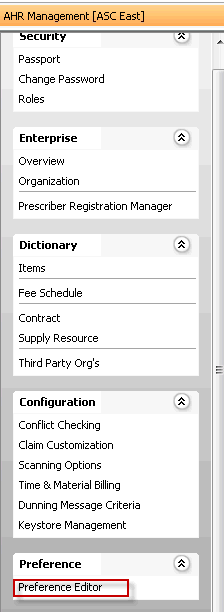
From the System Administration Sheet Bar, select Preference EditorPreference Editor. The Preference Editor Sheet BarPreference Editor Sheet Bar displays.


-
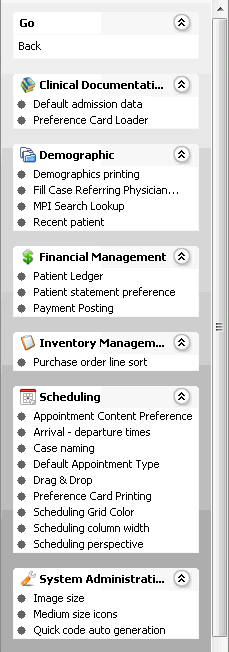
Under the Scheduling heading, click Appointment Content Preferences.
-
Select one of the tabstabs at the top of the screen to select the levellevel at which you wish to set preferences. If, for example, you want to set a preference for the BE, click the Business Entity tab.
Preferences are applied in the following order:
- Default system settings (if no preferences at all are set)
- User level
- User Group level
- Business Entity level
- Work Group level
- Business Group level
- Enterprise level
Not all levels are available for setting preferences for all system features.

-
If a level is not available, no tab for that level is shown on the screen. (e.g. if you can't set preferences for the BE, there will be no Business Entity tab)
-
If no preferences have been set for a level, "No saved data" appears on the tab for that level.
-
If one or more preferences have been saved for a level, "There is saved data" appears on that tab.
-
Set preferences for how you wish the data elements (patient name, appointment type, etc.) to appear on the Scheduling Grid:
-
From the drop down menus in each column, select the data element you wish to appear in each position. A blank line indicates no data will be displayed in that position. Click herehere to see an example.

-
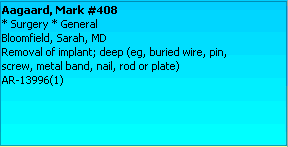
Click herehere to see how the selected data elements/positions will display on the Appointment on the Scheduling Grid. Note that the position of the data elements is as specified above, even though there are no actual marked "columns" on the appointment.

-
-
Click Save to apply the preferences you set on the current tab, then click the next tab for which you wish to set preferences and repeat these steps, clicking Save after setting preferences on each tab.
-
If you wish to go back to the system defaults for any given level, click the Reset button for that tab.
 Data elements should be selected for display in order of importance. Since the minimum number of slots any appointment can have would be one, select the three most important data elements for display on line one. These may include Patient Name, Account number, and Surgeon. Add additional elements in order of importance so that, as the length of the appointment is increased, more data elements will be exposed in their order of importance. Continue to add additional elements as desired until all of the spots have been filled.
Appointment Hover
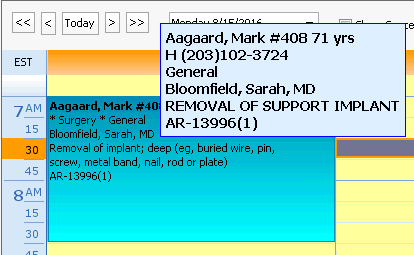
The system Appointment HoverAppointment Hover will display appointment information when the cursor is placed on an appointment in the Scheduling Grid. You may want to select data elements for display on the grid that are not included in the Appointment Hover to maximize the data that can be seen for an appointment without having to open the Appointment Edit screen.

The Appointment Hover will always include the following provided the information has been entered into the system for the selected appointment:
-
-
Patient Name / Account number / Age / Phone number
-
Anesthesia Type
-
Patient's Home Phone / Cell Phone
-
Surgeon
-
Procedure Description
-
Equipment
-
Clean Up time
-
Related Topics